How to change git default branch from master
Easily rename the default branch master to other name
Hey there! I’m Srebalaji. You are receiving this email because you have subscribed to level up your game in Git.
Recently, there are many suggestions about renaming the default branch master to some other name. This was mainly due to the master-slave metaphor that some people are talking about.
There is evidence that states it was intended to mention master-copy or master recording. And it is not intended to master-slave.
But I think it’s people's perspective and if some think that they are not cool with that they can change the default branch.
So let’s see how to change the default git branch master to default (you can use your preferred name)
Before starting I have to tell you that I have tried this in multiple repos and its working fine without any breaking changes. If you are not confident enough then fork your repo and try it first.
Prerequisites
Make sure your CI/CD flow doesn’t get interrupted.
Make sure you have merged all the PRs targeting master. Other PRs are fine
There are three steps in renaming the default branch
Change the branch name
Set remote upstream tracking for the new branch
Change the new branch name in repo host (Github, Gitlab)
Change the branch name
git branch -m master defaultThe above command just renames the default branch to the name default.
-m attribute is used to rename the branch name without affecting the branch’s history.
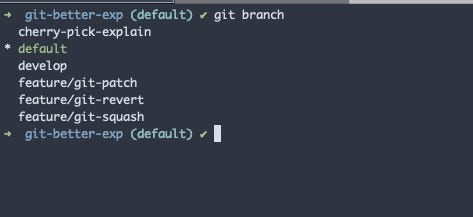
Now the default branch is changed in the local but not in the remote.
Set remote upstream tracking for the new branch
git push -u origin defaultThe above command will push the new branch to the remote.
-u attribute is used to set the upstream tracking for the branch.
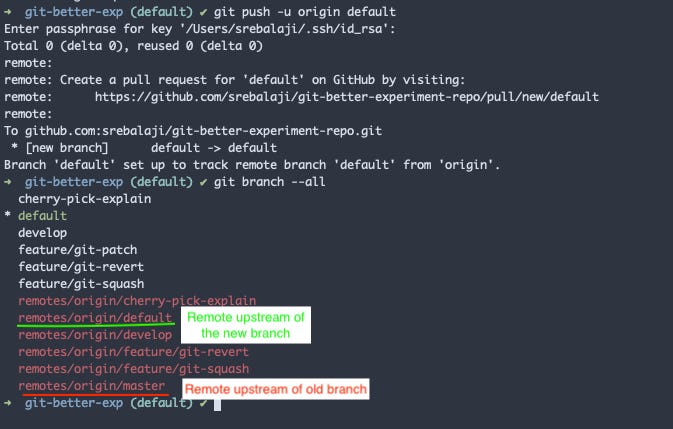
As you can see that the upstream is set for the new branch. But still, the reference to the old upstream is present in the local.
Change the new branch name in the repo host
In this tutorial, let’s consider Github. But the same option is also available in Gitlab, Bitbucket.
In Github, go to settings -> branches. You can change the default branch there.
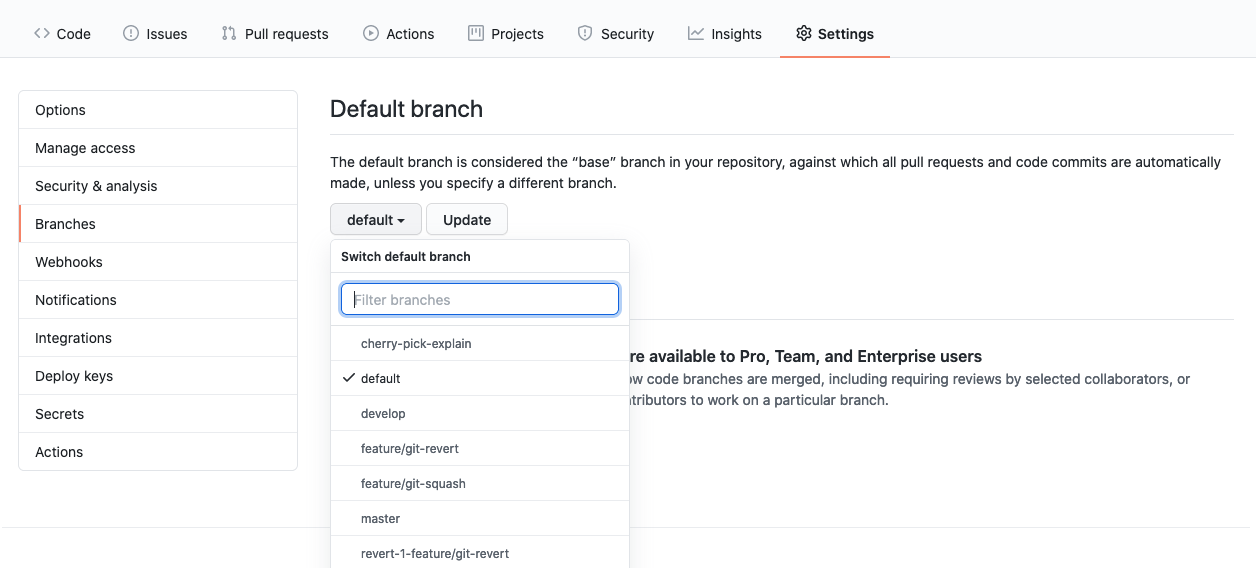
That’s it you are done.
But remember that the old branch’s upstream is still present. It won’t affect your workflow. But you should delete it to keep your repo clean.
To delete the old branch’s upstream you can use
git push origin --delete master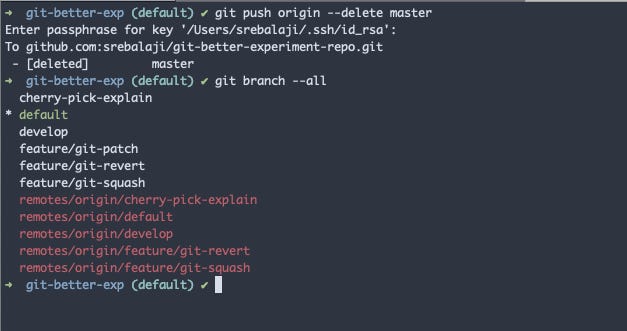
As you can see the old remote stream is deleted.
Now the changes are done in your local and in the remote host. Let’s see how to bring those to other people who are already using the repo.
I mean there will be other people who will be using this repo. They have to do few changes to complete the flow.
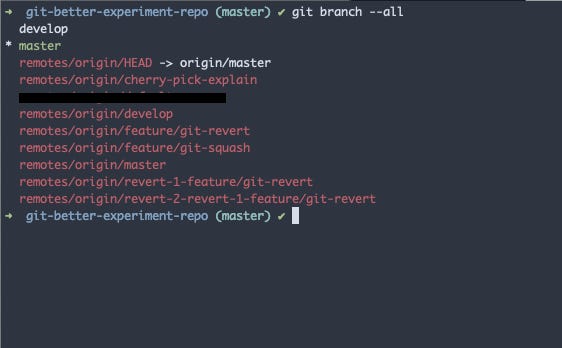
As you can see still the branch master is present in the local of others who are already using the repo.
There are three steps for people who are already using the repo
Fetch all the branches
Update the upstream remote’s HEAD
Rename the default branch
Fetch all the branches
git fetchThe above command will just fetch all the remote branches to your local.
Update the upstream remote HEAD
git remote set-head origin -aThe above command will query the remote host for the HEAD upstream and it updates that upstream in the local.
Rename the default branch
git branch -m master defaultThis is the same as the old one. We are just moving the branch without affecting the history of the branch.
As we have already set the remote upstream in the previous step, the new branch is changed and is in sync with the remote.
Now the person can work with the default branch.
As I said earlier, I have tried this is in multiple repos of mine and it’s working fine without any breaking changes. This may seem to be confusing at first, but if you understand the process and read it multiple times you will get familiar.
If you got any doubts or stuck somewhere, you can contact me.
That’s it for today
See you next week :) :)


answer: git config --global init.defaultBranch my_branch_name
If you take the etymology of "master copy" back one additional step, you just get right back to the master-slave metaphor.